

Making clear navigation light covers
In this article, I show you how to make clear nav light covers using scrap clear plastic.

Aircraft wing tips usually have red and green lights, to increase visibility. Similar to marine vessels, red on the left (port) and green on the right (starboard).
The lights are covered with streamlined clear covers to maintain aerodynamic airflow.
In scale models, clear parts are sometimes provided to replicate these, but some model kits have the wing tips moulded in opaque plastic.

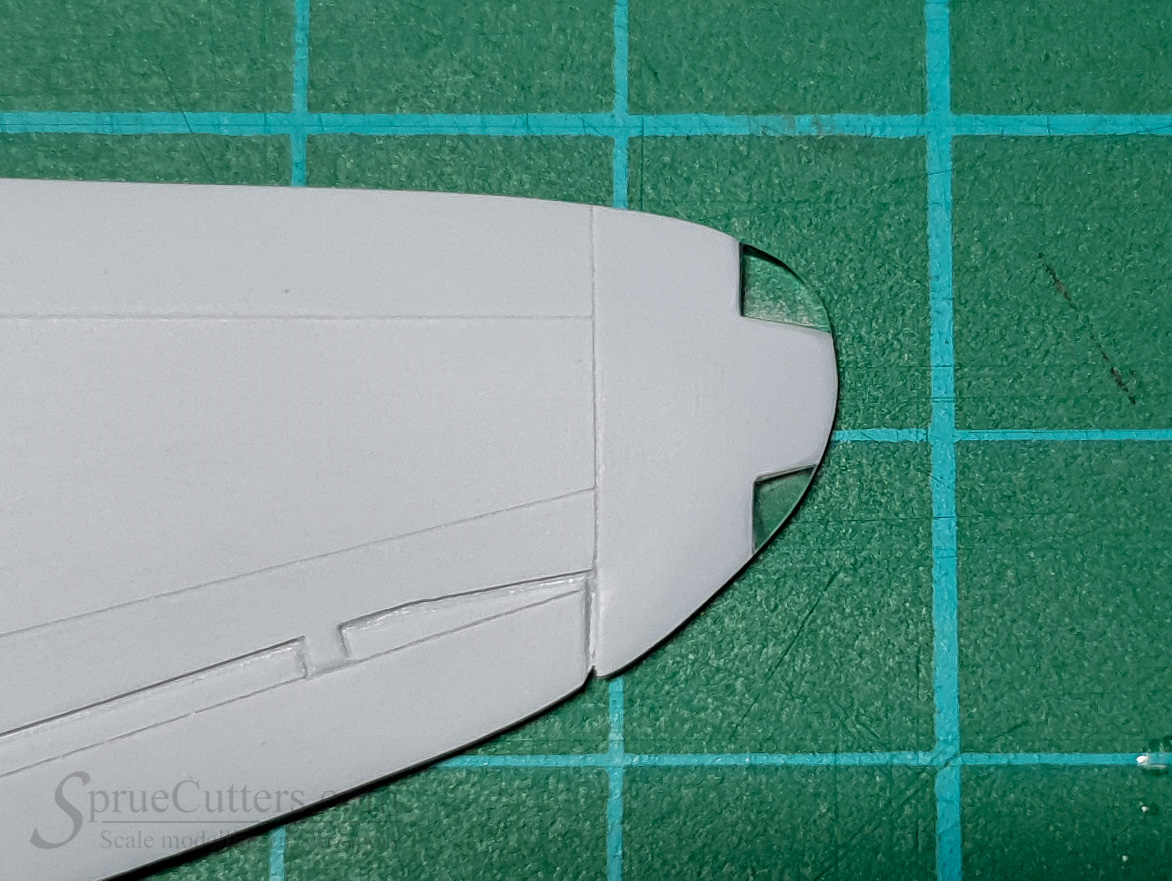
This model has the wing tips moulded in opaque plastic, with panel lines giving a rough indication of the nav lights.
Since there are no clear parts provided, we can use scrap clear styrene to make them.
First cut off the nav light areas, and clean up the edges using sandpaper.
Then, cut off a short length of clear sprue (best to keep the leftover sprues from the clear parts), then sand/file to fit the cut edges. Make sure the clear styrene does not have any internal cracks.
The outside profile will be shaped later.
The clear styrene is affixed onto the wing tips using liquid CA (super-glue).
Generally we avoid using CA on clear parts, because CA will fog up the clear styrene. This does not apply here because the "nav light covers" are solid, unlike a canopy.

Apply the CA glue liberally on the 2 contact edges. The CA should be "higher", to ensure all gaps are filled.
CA glue dries very quickly, and we can start shaping after 10 minutes. If the part falls off, just re-attach and wait.
Begin cutting down the outer profile using coarse sandpaper or files. Go gently to avoid knocking off the clear part.

Use progressively finer grit sandpaper to shape the clear styrene.
If you see any gaps, fill with liquid CA, wait, then sand again. CA dries transparent.

Here, the profile is finished, time to make it transparent.
Use very fine-grit sandpaper (2000-grit and finer), then finish up with fingernail buffing sticks to smooth out the scratches.
If there are no internal cracks, you will be left with perfectly transparent nav lights!
You can use the same techniques with kit-supplied clear nav lights too.
Happy modelling!